The Standard HDR Look of People
Captain Kimo’s HDR Technique for Portraits
It’s simple really… instead of shooting 3 exposures, I shoot 4.
Below are the first three exposures taken for the background.
 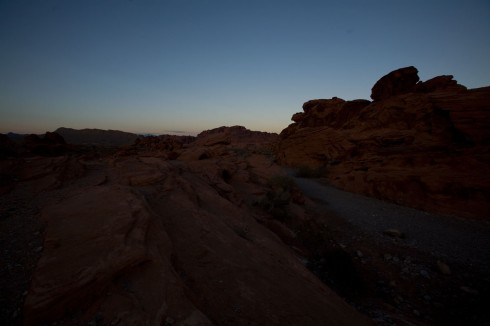 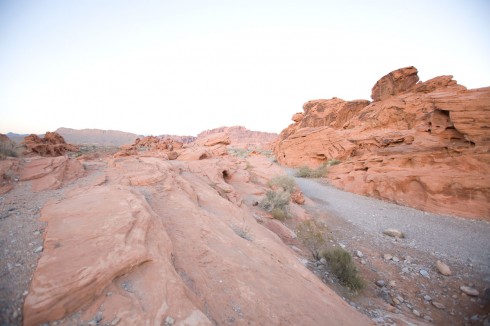 |
 The photo on the left is the 4th exposure. This photo is focused on me and will be superimposed onto the landscape above. Below are instructions to put it all together. The photo on the left is the 4th exposure. This photo is focused on me and will be superimposed onto the landscape above. Below are instructions to put it all together. |
Software and Plugin Required
- Photomatix – software for creating HDR
- Topaz ReMask – plugin used for masking layers
- Photoshop – photo editing program
Step 1 – Merge Landscape Exposures
The first thing we do is merge the three landscape exposures together to create our HDR photo. We do this by using Photomatix. The benefit of separating the subject from the background is that you can go crazy tone mapping without effecting the subject. Below is the final result of our tone mapping from Photomatix.
 |
Step 2 – Processing the Subject
[ad#Google Adsense-3]
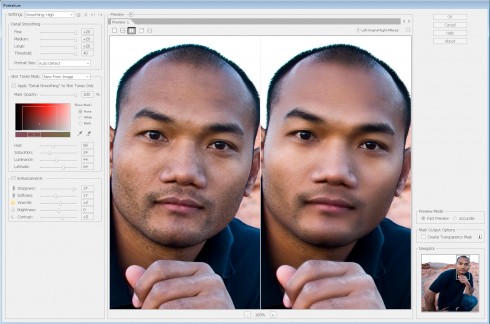
If your subject needs cleaning up, now would be a good time to remove pimples or unwanted blemishes. I use a plugin called Portraiture to do this because it does a fantastic job while saving me lots of time. Below is a screen capture of my Portraiture window. Left image is the original, right image is the filtered result.
 |
Step 3 – Masking the Subject
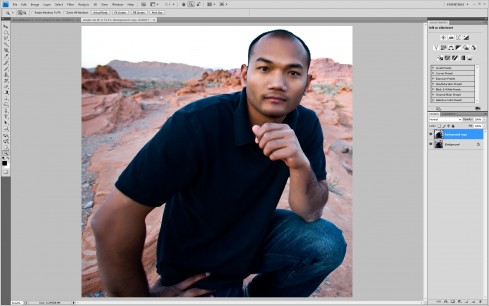
Next I begin masking out the background using Topaz ReMask, another time saving plugin! Below is the masking process using ReMask. Please note quality of screen capture program is a little grainy.
 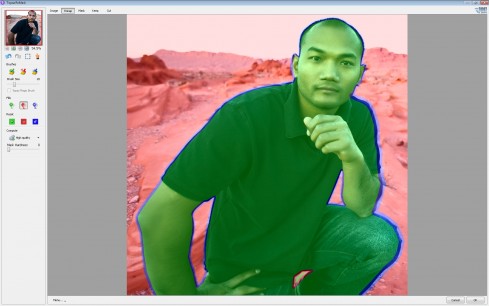 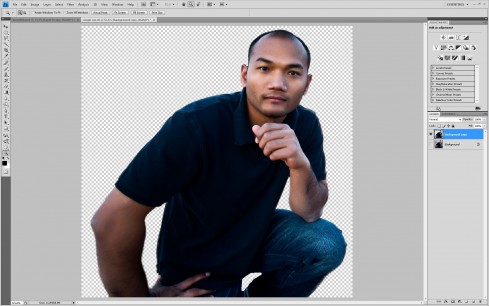 |
Step 4 – Superimposing Subject with HDR Photo
Pretty straight forward process. Take the photo of your subject and place it on top of your HDR landscape. Below is the result from Step 4.
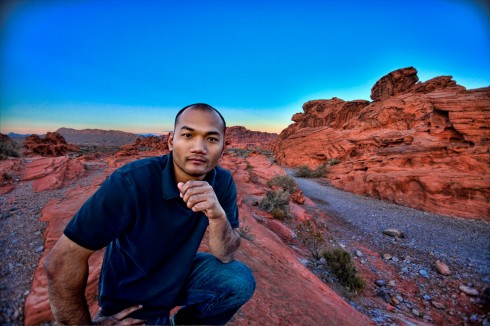 |
The above image isn’t the final product. There are a few more steps, like applying Topaz Adjust and re-cropping the image, ect… but I won’t get into that. You can read more about that in Chapter 5 of my HDR How-to Guide.
Enter your email below, then click button to join.


