Chapter Four
of Captain Kimo’s HDR How-to Guide
 It’s time to create our HDR photo using the exposures taken from Chapter 3. We create our HDR photo by combining the exposures together and to do this we’ll need HDR software. The software I use is called Photomatix. Click here to learn more about Photomatix Pro.
Photomatix Video and Step-by-Step Instructions
Using Photomatix to create your HDR image is quite simple. Below is video that will guide you through it.
Step 1 – Photomatix Guide
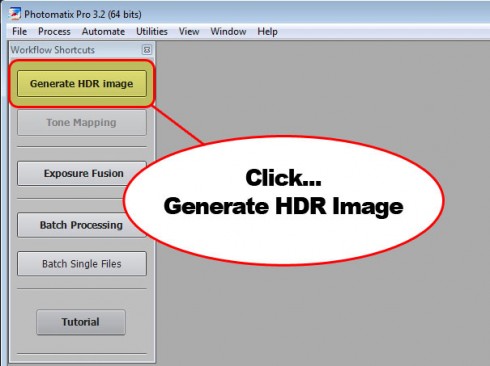
Once you’ve download and installed Photomatix launch the program. Click the Generate HDR image button on the left menu window.
Step 2 – Photomatix Guide
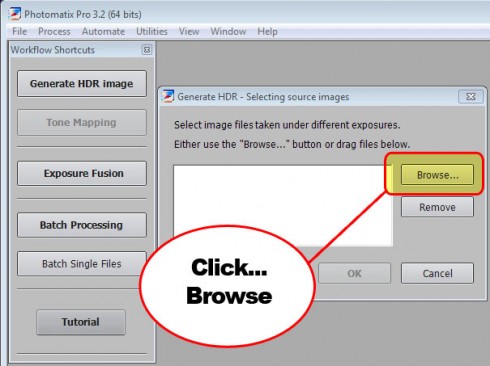
A new window will appear. Click the Browse button.
Step 3 – Photomatix Guide
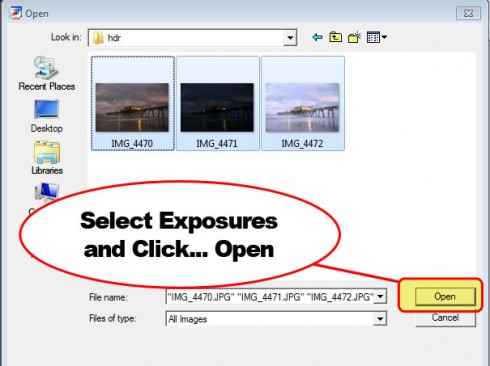
Another window will open allowing you to select the exposures you want to merge. Select your exposures and click Open.
Step 4 – Photomatix Guide
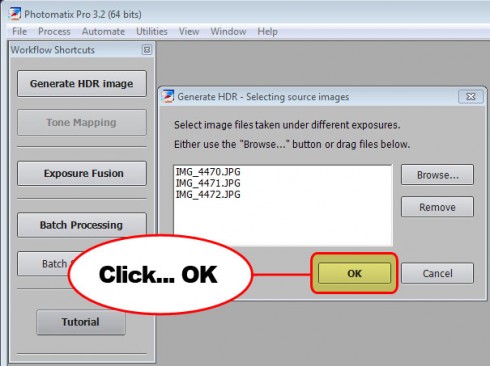
After you’ve selected your exposures. Click the OK button.
Step 5 – Photomatix Guide
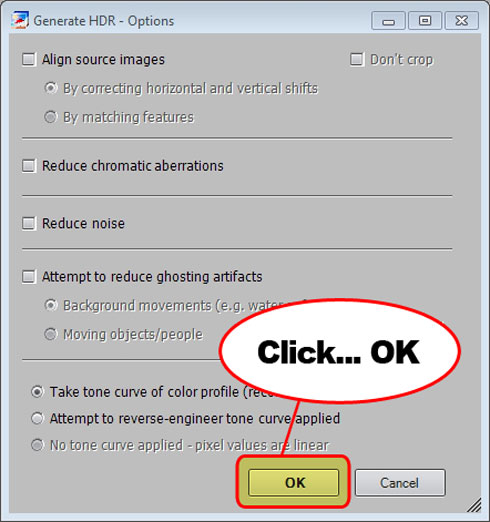
Generate HDR – Options window will appear. Don’t worry about any options and click the OK button.
Step 6 – Photomatix Guide
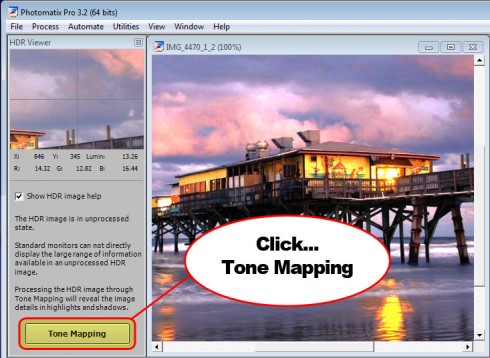
Your not done yet. You still need to tone map this photo to properly display your HDR image. Click on the Tone Mapping button to begin tone mapping your image.
Step 7 – Photomatix Guide
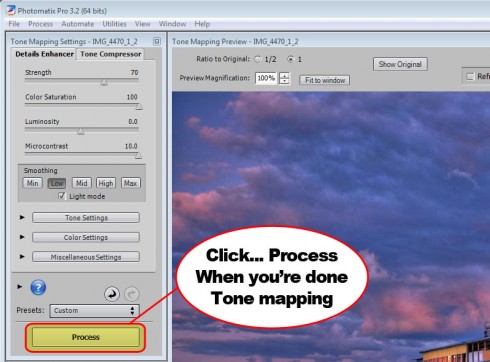
Don’t let all the sliders fool you into thinking this is complicated. You won’t even use most of them. Every photo is different so you will need to play around with the settings to get the result you want.
Step 8 – Photomatix Guide
Once you’re done adjusting your settings click the Process button.
Step 9 – Photomatix Guide
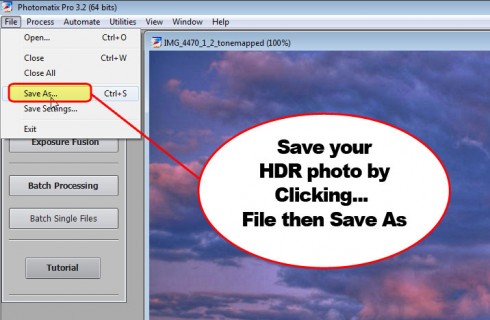
Your done… see how easy that was! Don’t forget to save your photo. Go to File menu and click Save As… and save it somewhere on your computer. Congratulations! You just created your first HDR photo.
Final HDR Photograph
Below is the final HDR result from Photomatix. I also included the original exposure for reference. So tell me… do you prefer the original or the HDR image?
Enhancing Your HDR Photograph
My HDR technique involves one more step. I take it into Photoshop and enhance it using Topaz Adjust. Proceed to the last chapter to make your HDR image even more amazing!
Continue to Chapter 5 – HDR Enhancement

